Correct Corner > Object - Object (Trim Menu)
|
|
Correct Corner > Object - Object (Trim Menu) |
www.CAD6.com |
|
This command can be used to trim two objects so that they form a corner which is immediately corrected using different modes. The result will be several individual, separate objects.
After choosing the command, the "Correct Corner" dialog appears, in which the correction parameters to be used can be entered.
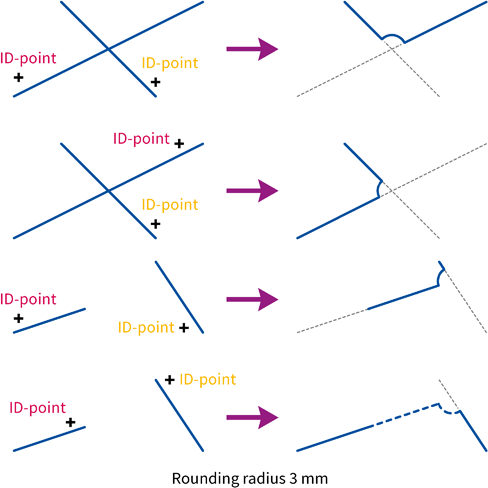
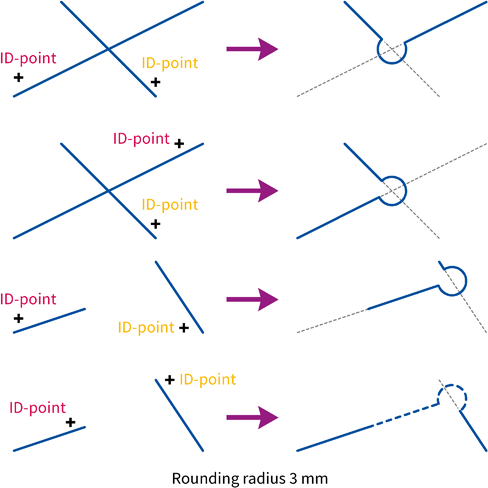
The position at which the object was identified (the "ID point") affects the rest of the command. It determines which end of the object will be altered. Refer to the graphics at the end of this section.
The position at which the object was identified (the "ID point") affects the rest of the command. It determines which end of the object will be altered. Refer to the graphics at the end of this section.
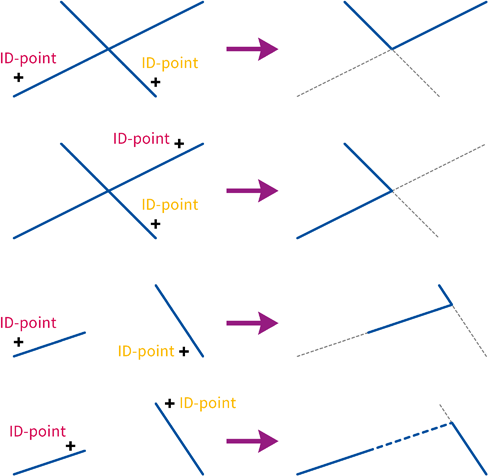
The position of the ID points determine which end of the lines will be altered. The end of the line closer to the ID point is always the one altered. In this way, any of the four possible corners can be generated and rounded (see graphic).
Use a radius of 0 to connect two objects without a rounding:
Note a basic rule for trimming: The object changes, wherever it is clicked on.
If the corresponding option is enabled, the properties of the object identified first will be applied to all involved objects – even including the object identified second.
If the lines identified are parallel, then an error message appears.
A corner within a curve or surface can be corrected using the commands Correct Corner > One Corner and Correct Corner > Complete.
|
CAD6studio Release 2025.0 - Copyright 2025 Malz++Kassner® GmbH