Notch Edge > Distance, Numerical (Trim Menu)
|
|
Notch Edge > Distance, Numerical (Trim Menu) |
www.CAD6.com |
|
This command can be used to notch a line (either separate or within a curve or surface).
After choosing the command, the "Notch Edge" dialog appears, in which the notching parameters to be used can be entered.
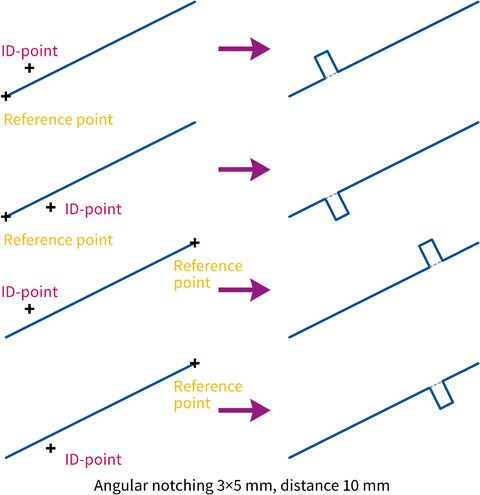
The position at which the line was identified (the "ID point") affects the rest of the command. It determines to which side the notching is created. This is indicated by a guide line.
The center point of the notching can be specified by clicking on any point within the drawing. A perpendicular is dropped from here to the trim object to work out the exact separation point. In most cases it is a good idea to snap to the intersection of the trim object with another object. To do this, hold down the SHIFT key during point entry.
After entering the reference point, a dialog appears, in which the distance of the notching to the reference point can be entered. An arrow indicates the direction in which a positive distance is measured. Negative values run in the opposite direction.
The position of the ID point determines to which side of the line the notching is created. It will always be on the side on which the ID point lies. The position of the reference point relative to the ID point determines the orientation of the distance (see graphic).
Note a basic rule for trimming: The object changes, wherever it is clicked on.
If the lines identified are parallel, then an error message appears.
If a notching shall placed freely within an edge, use the Notch Edge > Placeable command.
|
CAD6studio Release 2025.0 - Copyright 2025 Malz++Kassner® GmbH